Titles or headings play a crucial role in helping both website visitors and search engines understand the content and structure of a webpage. The Title widget enables you to develop titles that convey your point clearly. The color, style, alignment, and other settings are all adjustable.
Adding a Title Widget
To add a Title widget:
- Go to Visual Editor by selecting Advanced mode from the mode switcher on the Dashboard top panel, or navigate to Dashboard > Channels > Advanced.
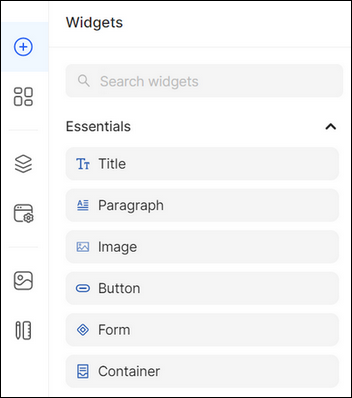
- Open the Widgets list on the left panel.
- Type the widget name in the search bar or find it in the Essentials grouping.
Drag and drop the Title widget from the list onto the desired crafting area of the Layout Canvas.

Configuring the Title Widget
Once you have added the Title widget, you can edit widget Styles, Content, and Settings from the Property Panel. The properties are changed and updated not only from the Property Panel but also from the Design System > Typography.
Tip: You can change the link color of the Title widget from its Property Panel, and it will no longer maintain the primary color defined in the Design System.
To configure the Title widget:
- Go to Styles to modify the widget styling features:
- Select one of the following states: Normal or Hover.
- Make the necessary configuration of principal styling features from the Property Panel (see Global Styles). Global Styles are a set of predefined style settings that can be applied to widgets across the website. They provide a constant appearance by defining default styles for all the widget types.
- Click the Dotted Menu to the right of Typography and select the corresponding option:
- Reset Styles: Refers to discarding any modifications made to a particular heading or title.
- Override Styles: Refers to changing specific aspects of a given heading or title to change its default styles, such as specifying a specific font, size, and other formatting properties for all H3 elements in the website layout.

2. Go to Content and make the necessary configuration of widget content:
- Edit the heading/title text.
- Expand Link and click Add Link to add clickable phone numbers and email addresses or navigate your customers to your website's Main or System pages, products, collections, or collection items. You can redirect your users to external and internal websites, allowing your customers to navigate to specific destinations in a new tab or by replacing the current tab.

3. Go to Settings and expand Visibility to modify the widget visibility on your website. Select who can view the widget according to the customer’s location, session status, type of used device, browser, and language preference (see Visibility Settings).

💡 If you have questions or concerns, contact us directly via the Live Chat box, in the lower right corner. Our Support Team will provide you with top-notch quality support 24/7.