The Visual Editor is a design system encompassing all the required toolkits to create layouts for websites. The Visual Editor is your go-to platform for designing websites from scratch, using templates, making customizations, and more.
Accessing the Visual Editor
To access the Visual Editor, click the mode switcher in the top-right corner of the page and select Advanced mode.

Tip: Alternatively, click Sales Channels in the left panel and select Advanced from the options.

The Visual Editor contains the following options:
- Top Panel
- Navigation Pages
- Widgets
- Structure Tree
- Media
- Design System
- SEO
- Page Layout Settings
Top Panel
The Top Panel consists of the following components:

- UC Menu: Navigates to the Project Details, Billing, and Projects pages.
- Page: Homepage (Navigation Pages): Provides access to all the Collections, Main, and Ecommerce pages.
- Breakpoint Switcher: Ensures responsive design across devices by switching between screen sizes.
- Mode switcher: Provides access to Dashboard, Content Mode, Design Mode, and Advanced Mode, allowing you to manage products and orders, customize text and visuals, adjust structure styles and translations, and customize your layout.
- Support and Resources: Provides access to Ucraft and eCommerce community and help documentation, ensuring that you have the necessary resources to navigate the platform successfully, resolve issues, and receive timely assistance when needed.
- Chat with Live Support: Allows you to contact a live support specialist for quick responses to common queries and general assistance.
- Preview: Displays the current version of your website. In the preview mode, you can see your website on different breakpoints and open the website in a new tab.
- Publish: Saves the changes to your Ucraft Next domain.
- Undo/Redo: Reverses or redoes your actions using shortcuts (Ctrl+Z or Cmd+Z for undo, Ctrl+Y or Cmd+Y for redo).
- Language Switcher: Switches between your website languages for editing.
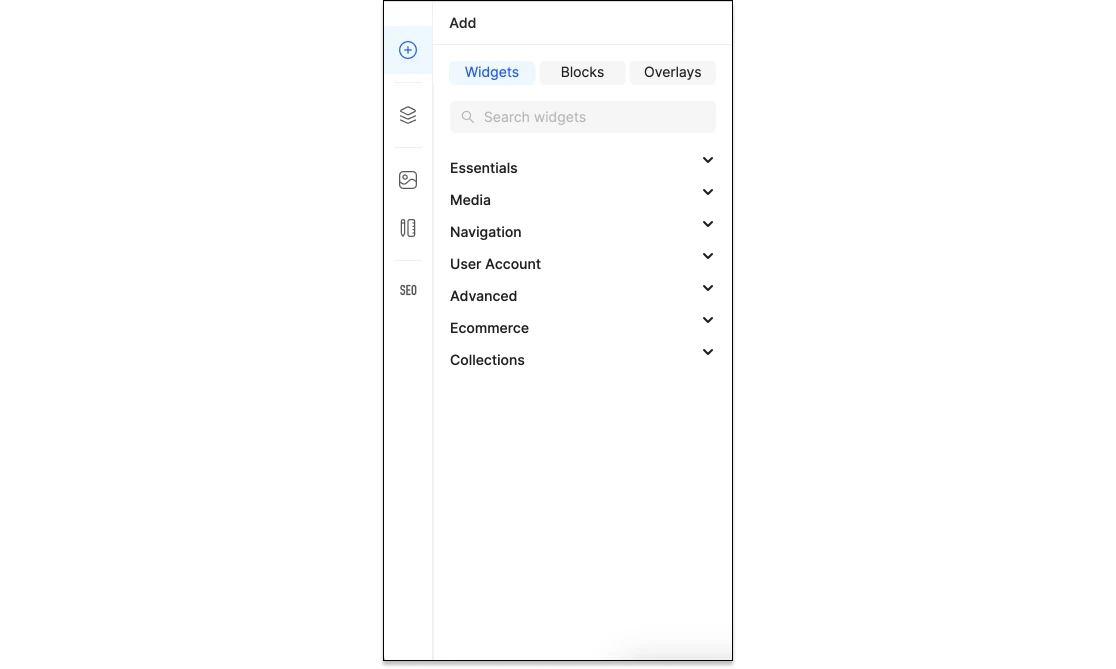
Widgets
Widgets improve website functionality and user experience. Drag and drop widgets onto the Layout Canvas to add and customize them. Widgets offer configurable options for styles, settings, and content. Access widgets by clicking the Widgets icon on the left panel.
Tip: You can copy and reuse Widgets and their entities with their styles and settings.
In the Visual Editor, widgets are categorized into the following groups:
- Essentials: Helps you structure and present information, add images and buttons, and organize content within a coherent layout.
- Media: Enables you to effectively manage and display visual content elements on their website.
- Navigation: Facilitates navigation and quick access to desired content on your website.
- User Account: Adding a widget provides easier access to your website users to their accounts.
- Advanced: Provides advanced features and functionality to enhance their website customization.
- Ecommerce: Supplies you with comprehensive tools and features to manage your online store effectively.
- Collections: Enables you to manage and display collections of related items, such as articles, products, or events.
Note: Clicking a widget automatically selects it, while Ctrl/Cmd-clicking selects a block.
Tip: To add a widget within a block, row, or widget, hold the Control key while dragging and dropping.
Blocks
The Blocks tab within Widgets is designed to improve the user experience by optimizing time efficiency and simplifying the use of pre-designed blocks on the website.
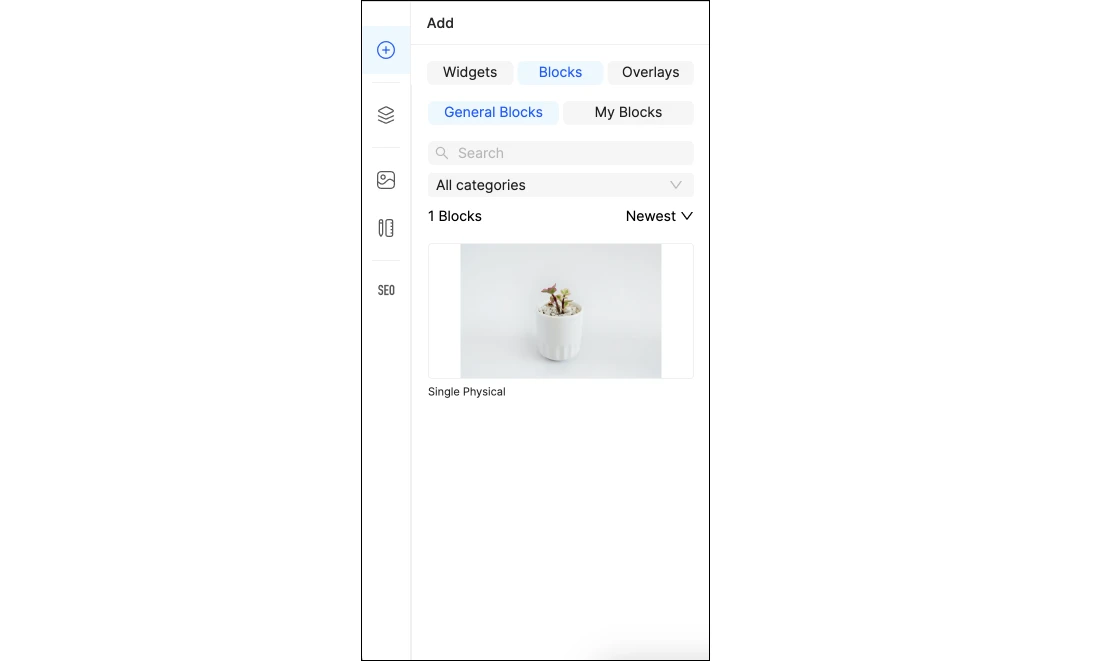
The Blocks tab consists of the following subsections:
- General Blocks: Pre-made block templates ready for integration. These blocks are created and offered by Ucraft.
- My Blocks: Library of block templates created from scratch. These blocks are created and saved by the user.
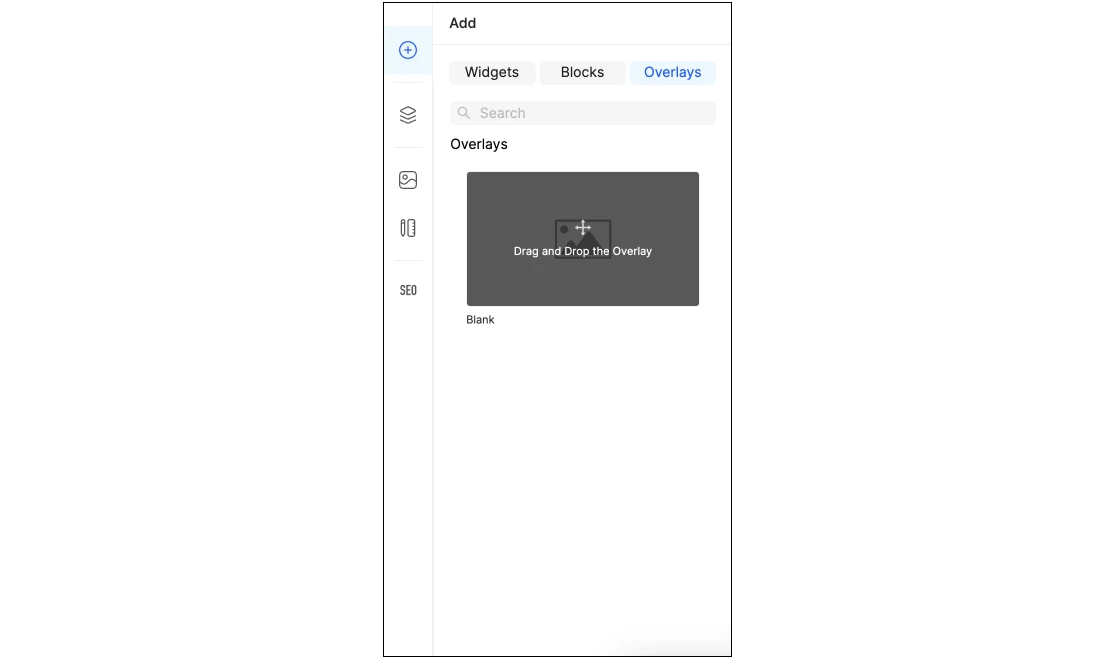
Overlays
The Overlays tab within Widgets is designed to showcase the available overlays: additional content or interactive features that can be customized via the Slide Bar widget (see Overlay).
Structure Tree
The Structure Tree visually represents your website organization, effectively helping you manage and arrange blocks, rows, and columns. View and navigate your website layout structure without scrolling. It displays customizable block names for easier identification.

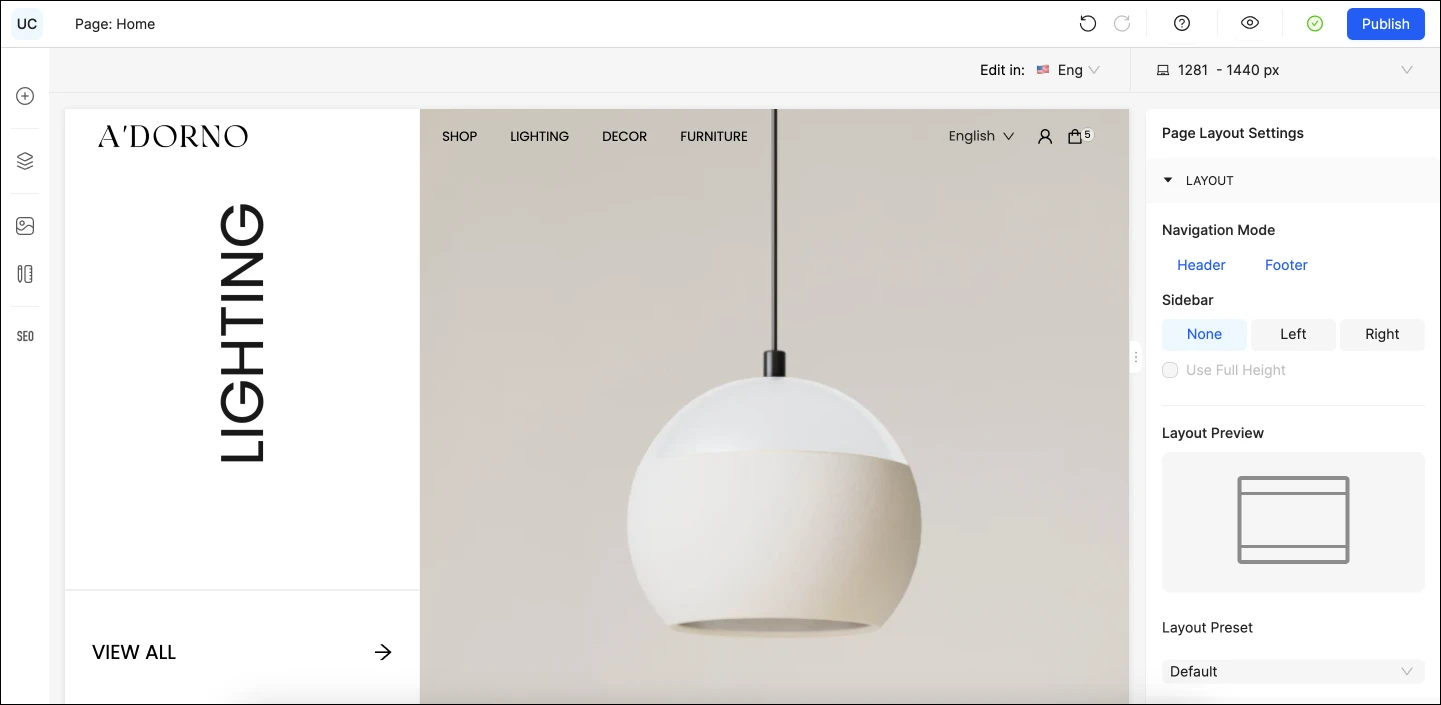
Page Layout Settings
The Page Layout Settings section allows you to easily customize and create layout structures for your web pages, while the Layout Preview enables you to visualize the design changes made.
The Page Layout Settings are displayed on the left panel of Visual Editor when no component (blocks, rows, columns, widgets, microelements) is selected.
Media
The Media app oversees visual content on your platform, including images, videos, audio, documents, and vectors. Design imagery for your website using this section.
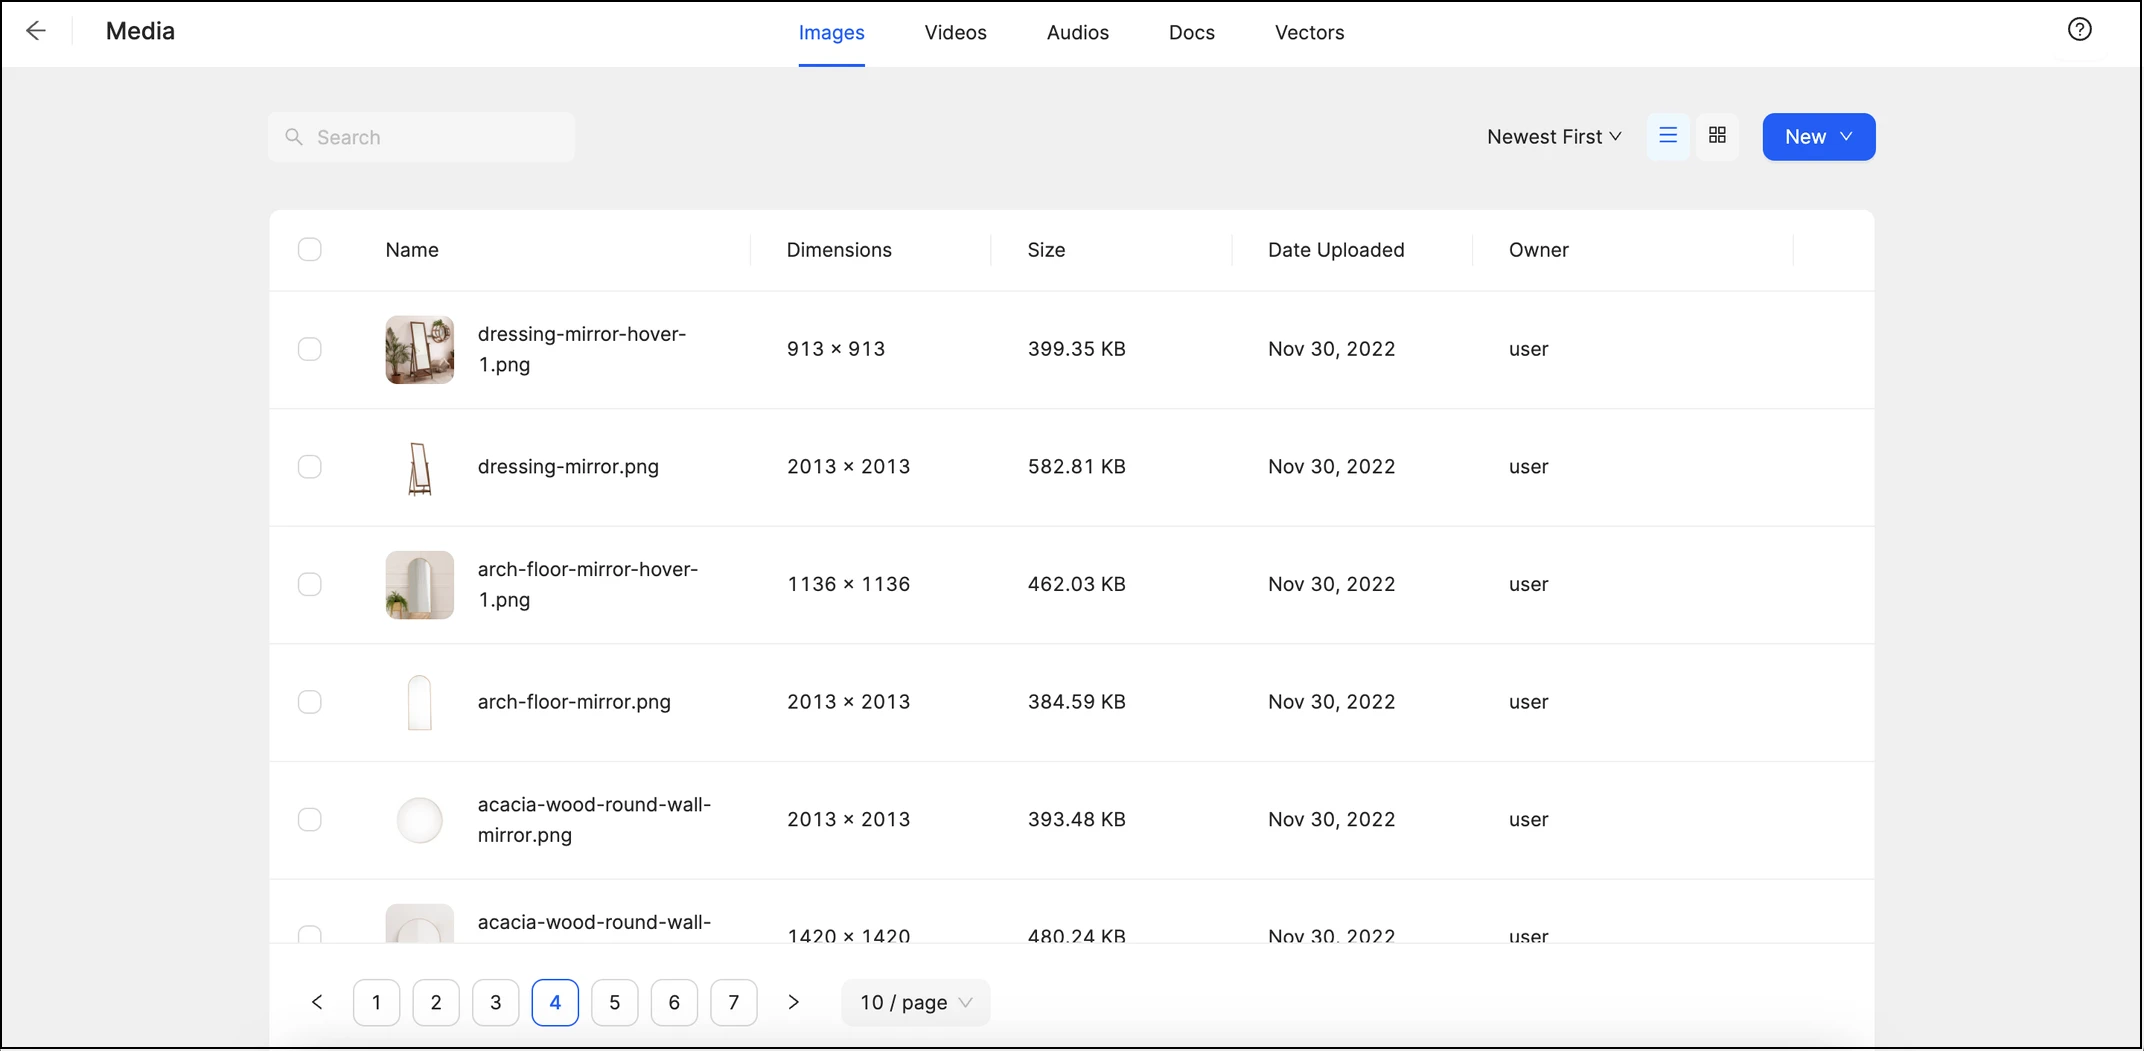
In the Media app, you can perform the following actions:
- Images: Upload images to your website.
- Videos: Upload videos to your website.
- Audios: Add audio files to your website.
- Docs: Add documents to your website.
- Vectors: Add your desired icon vectors, arrange them in any preferred order, and categorize them according to your needs.
- Search: Search for relevant files and folders.
- Sort by: Sort the items by relevant order.
- List Type Layout Preview: Display the items in list mode.
- Grid Type Layout Preview: Display the items in grid mode.
Design System
The Design System section provides the solutions for designing your website. It lets you customize your website content style, Typography, UI Elements, and Variables.
Click the Design System icon in the Visual Editor's left panel to access the Design System section.
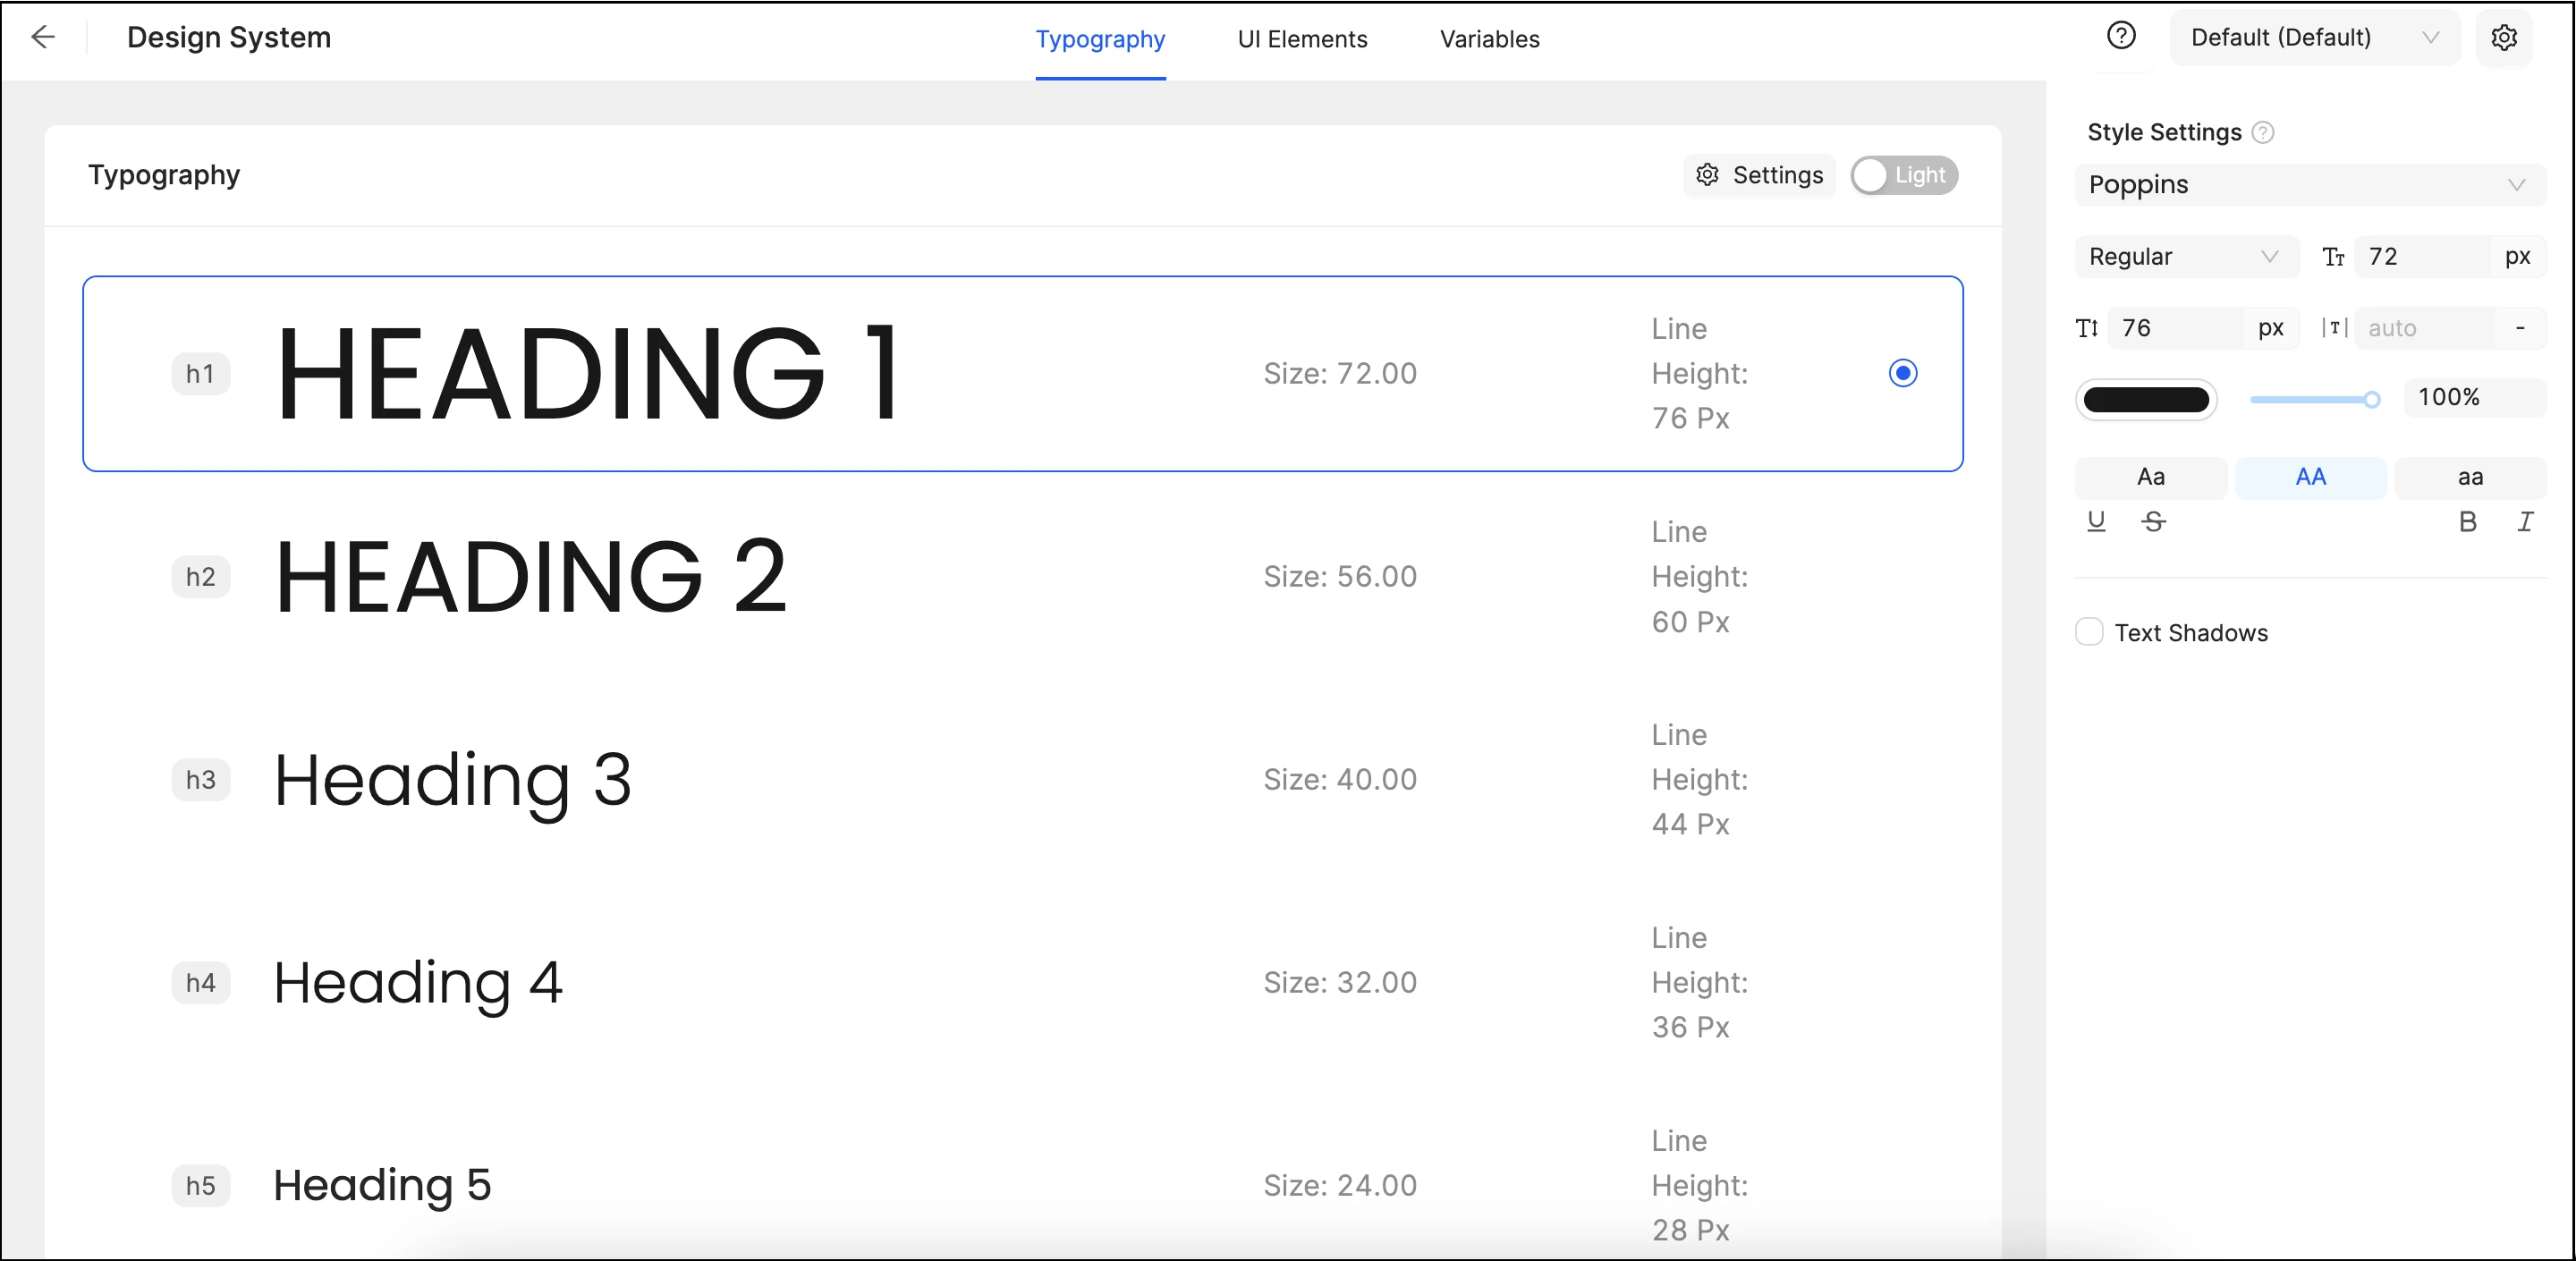
The following options are available for customizing the design on your website:
- Typography: Customize and update the fonts of your website.
- UI Elements: Encompass the style settings of the widgets and elements.
- Variables: Control custom properties that define values to be referenced and reused throughout your website.
- Preset Dropdown: Set the default preset or add a new one.
- Settings: Modify the default preset name and/or make a copy of it.
SEO
The SEO (Search Engine Optimization) section is a critical aspect of the website's success, influencing its visibility and ranking on search engines such as Google and Bing.
The SEO section optimizes webpage visibility on search engines. It includes categories for Main Pages, System Pages, and Redirections. Click the SEO icon in the Visual Editor Left Panel to access the section.
💡 If you have questions or concerns, contact us directly via the Live Chat box in the lower right corner. Our Support Team will provide you with top-notch quality support 24/7.